QEMU/KVM — Virtualization on Linux
While i’m waiting to finish my Slitaz image download from the official site (i’m running out of my monthly data plan and this Linux distro weights only 40mb) i wanna share with you few thoughts on how virtualization can be achieved on Linux, since i find this topic extremely interesting and usefull for everyone who wants to deal with cloud, distributed systems and infrastructure in general.
I’m writing this few lines since i want to get my feet wet about clusters administration, where for example with tools such as Vagrant, one can build a little cluster of nodes in no time and because i want to try out new stuff, i’ll first try to install KVM/QEMU and then i’ll try to create several nodes using the combo Vagrant + libvirt.
For now this post cover just the first part of this adventure.
First of all, our journey starts with QEMU an open source full-system machine emulator and virtualizer. Simply put, it allows to simulate multiple full operating machines comprehensive of an operating system, persistance and network functionalities.
It’s an emulator because it can runs OS and software originally made for different CPU architectures (e.g. ARM processors ) on whatever PC based on a different architecture.
It’s a virtualizer since it can achieve almost native performance executing guest code on the host CPU.
And KVM is a virtualization module in Linux kernel which allows QEMU to use the kernel as an hypervisor and provide the virtualization feature, if the host processor natively supports virtualization (Intel VTx or AMD-V).
KVM is nothing but a loadable kernel module, kvm.ko, that provides the core virtualization infrastructure and a processor specific module, kvm-intel.ko or kvm-amd.ko.
I’ll not dig too much into the comparison between hypervisors and where KVM can be exactly placed among the hypervisors currently existing, since there are tons of threads about this on the internet (e.g. this interview to one of the principal developer behind KVM), but i tend to consider KVM as an hypervisor type 1 since there is no additional layer between the hardware and the linux kernel, where KVM module resides.
You might be familiar with alternative virtualization softwares but keep in mind that KVM results to have better performances with respect to Virtualbox for example.
Installation
First of all we have to check if our cpu has hardware virtualization support (Intel — VTx or AMD-V) and this can be determined running:
egrep -c ‘(svm|vmx)’ /proc/cpuinfo
If the result is an integer different from 0 you are safe and your virtualization feature is enabled. Otherwise you need to enable it from your BIOS.
Then run the command to install KVM, QEMU and related dependencies:
sudo apt-get install qemu-kvm libvirt-bin bridge-utils virt-manager
You may need to reboot your machine and then you can start play with virtual machines (or domains in virsh terminology).
If you want to interact by command line you can now use the virsh command, which can be used to completely manage virtual domains, which reprsents “context” or “entitities” inside the KVM Hypervisor platform.
Basically virsh interacts with libvirt which is a library written in C for managing platform virtualizations.

Anyway, i’ll use the Virtual Machine Manager tool which is a GUI application for easily managing and setup virtual machines. We already installed this utility before and can be found on the application bar under the Virt-Manager entry.
Creating the first Virtual Machine
This is how the manager looks like once opened for the first time with no VMs created

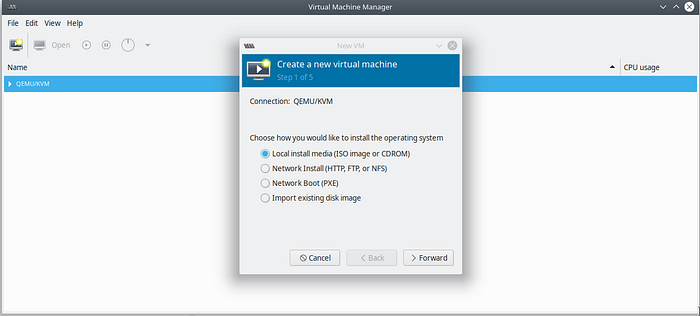
I’ve planned to study UFW to harden a bit my laptop, so i’m going to create a VM with a very light distro for testing purposing. In my case i’ve already downloaded the .iso on my laptop so i’ll choose the first option:
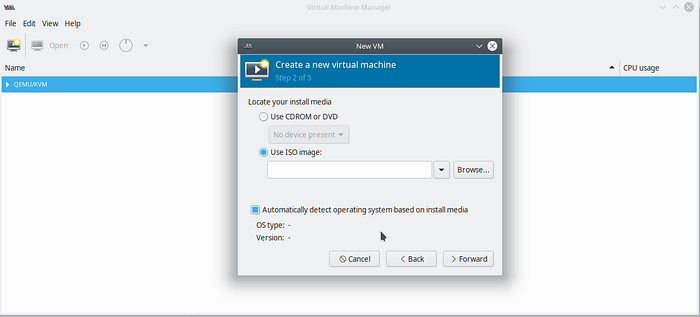
and i select the image
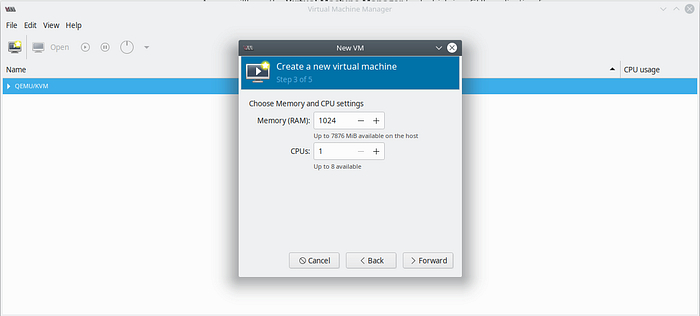
Once chosen the image we want to install we can easily choose the amount of resources to reserve for this machine, such as the RAM memory, CPU and disk. I’ll leave the default numbers since slitaz runs with very minimum resources.
On the last step we can confirm our setup and our disk image will be placed by default in
/var/lib/libvirt/images/
so they can be easily moved and imported from other environments. (This concept is extremely important in virtualization, portability of images/disk/snapshots allows to build scalable and replicated architectures in no time! We will see more about this when we will talk about Boxes in Vagrant.)
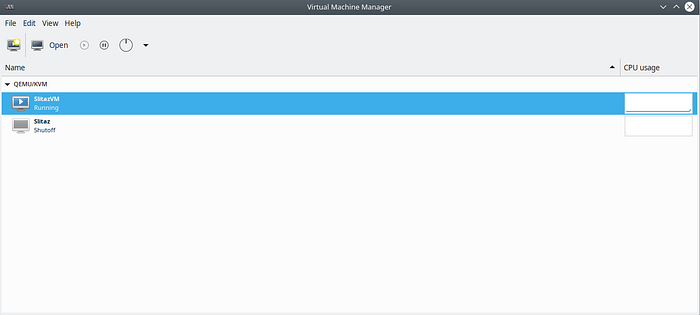
This is the manager’s window just after our previous confirmation. From where we can start, pause, stop, migrate and restore our virtual machines.
That’s it, now you are able to play a bit with virtual machines on Linux and you can also start exploring the Openstack or Vagrant world for managing many virtual environments easily !